Wall Safe vs Floor Safe: Which Hidden Home Safe Fits Your House
Affiliate Disclosure: This article contains affiliate links. If you buy through these links, we may earn a commission at no extra cost to you. Our editorial opinions are our own and are not influenced by affiliate relationships. Read our full disclosure policy →
Contents
Quick Answer
A wall safe hides inside a stud bay and is a realistic weekend DIY project for most homeowners. A floor safe hides below the floor, and while a handful of compact models bolt onto a wood subfloor, a genuinely recessed floor safe in a concrete slab home usually means concrete coring or a professional installer. Neither is inherently more secure than the other — both rely on a burglar not finding them rather than outlasting one who does. And almost none of the compact models built for either location carry a real fire rating, which is the tradeoff most buying guides skip.
Two Different Concealment Strategies, Not Two Tiers
Search results for “wall safe vs floor safe” tend to frame this as a good/better comparison, as though a floor safe is simply the more serious version of a wall safe. It is not. They are two different answers to the same problem — keeping a burglar who is already inside your house from finding your valuables in the eight to ten minutes they are usually willing to spend looking. A wall safe hides inside a stud bay you already have. A floor safe hides below a floor you already have. Neither one wins on raw steel thickness the way a standalone safe does; the security in both comes almost entirely from the burglar not knowing where to look.
That makes the real decision a construction question, not a security question. Which cavity does your house actually give you easy access to: the space between two wall studs, or the space below your finished floor? The answer depends on how your house is built, and it is worth being honest about that before you buy either one.
Which Concealment Problem Do You Actually Have?
🧱 A wall safe fits if…
- You have interior walls with standard stud framing and no idea what floor structure is under your feet
- You want to install it yourself in an afternoon with basic tools
- You want the safe at chest height, easy to reach without kneeling
- You live in a condo or upper-floor apartment where the floor below you is someone else’s ceiling
🪵 A floor safe fits if…
- You have a rug, closet floor or other spot you can cover completely, and you are fine kneeling to open it
- Your home has a basement or crawlspace, so a wood subfloor install has real headroom below it
- You are comfortable hiring a pro, or your model bolts onto a subfloor rather than requiring concrete work
- You specifically do not want anything visible even when a picture frame or shelf gets moved
If you read both columns and pictured your own house rather than a generic one, keep reading — the requirements below are where this decision usually gets made for you, not by preference.
What a Wall Safe Actually Requires
Standard residential framing places wall studs 16 inches apart, center to center, which is why nearly every between-the-studs wall safe on the market is sized to drop into that exact cavity without cutting or removing a stud. The depth you have to work with is set by the wall itself: roughly 3.5 inches of usable depth behind standard 2×4 framing, or about 5.5 inches behind 2×6 framing. That is the real ceiling on how much a wall safe can hold — both of the models covered below run about 4 inches deep, which is typical for the category, not a compromise specific to either one.
Before you cut anything, find a stud bay that is actually clear. Liberty Safe’s own installation guidance is blunt about this: check for plumbing vents, electrical runs and HVAC lines running through the cavity before you commit to a location, because a wall safe that lands on a wire or a vent pipe is a bigger problem than the safe was meant to solve. In practice this means a stud finder, a small inspection hole and a flashlight before the full cutout — several real buyers of the picks below describe doing exactly that, and one specifically warns about “fire-stop” cross studs that sometimes interrupt an otherwise clean 16-inch bay.
This is genuinely a project most homeowners can do themselves with a stud finder, a drywall saw, a level and a drill. If you have ever hung a heavy mirror by locating studs yourself, or handled installing a deadbolt, a wall safe install is a comparable skill level, just with a bigger cutout. The honest caveat is alignment: stud spacing in an older or hand-framed house does not always land exactly on 16 inches, and a safe built to that spec can end up needing a shim, a filler strip of lumber, or occasionally does not fit at all without adding blocking.
What a Floor Safe Actually Requires
A floor safe’s install path depends entirely on what is under your floor, and that splits into two very different jobs. Liberty Safe’s guidance draws the same distinction: floor safes go in below floor level, in concrete or in a framed wood system, typically with the lid sitting flush to the finished floor — and in a concrete-slab home, that location has to avoid post-tension cables, radiant heating lines, plumbing and structural members before you core anything. Coring an existing slab without knowing exactly what is inside it is not a DIY weekend project for most homeowners; it is the single biggest reason a floor safe install is more often handled by a professional than a wall safe is.
A wood subfloor is the friendlier version of this job. A compact floor safe designed for that setup mounts between floor joists under existing floorboards, using the joist bay as the cavity the same way a wall safe uses a stud bay — the Barska model covered below is built exactly this way, sitting flush enough with the surrounding floor that a rug or cabinet can sit on top of it. The rule that matters here is the one every framing guide repeats: never cut into a load-bearing joist to make room. If the joist bay itself is not deep or wide enough for the safe you want, that is a sign to pick a smaller safe, not to notch structural lumber.
Either way, Liberty Safe’s own framing is realistic rather than reassuring: whether a homeowner can do this “depends on tools, construction type, and comfort level around drilling, framing, and utility avoidance,” and professional help is the right call “if you’re unsure about what’s behind a wall or below a floor”. For a slab foundation specifically, that uncertainty is the default, not the exception — which is why we are not going to pretend every floor safe on this page is a weekend project the way the wall safes above genuinely are.
Fire Rating: The Limitation Both Share
Here is the honest gap most buying guides skip past: concealment and fire protection are different engineering problems, and a safe built to solve one rarely solves the other. “Fireproof” on a product listing is a marketing word; a real fire rating comes from an independent test. In North America that test is UL 72, and Underwriters Laboratories classifies record-protection equipment into Class 350, Class 150 and Class 125 tiers depending on what they keep alive inside — paper, magnetic media or flexible computer disks, respectively — through a specific furnace temperature and duration. SafeWise’s own buying guidance tells readers to look specifically for a safe marked “UL Certified,” because that is the difference between a tested claim and an untested one.
Of the four safes covered in this guide, exactly one carries that certification. The Paragon Lock & Safe In-Wall Safe and the Viking Security Safe VS-52BLXW make no fire-rating claim at all, and neither does the compact Barska AX12656 Hidden Floor Safe — all three are security products, full stop. The SentrySafe SFW205CWB is the exception: it is UL Classified to keep its interior below the paper combustion threshold through 1 hour at 1700 degrees Fahrenheit, and it is separately ETL verified as waterproof. That single difference is also why it is roughly triple the price and more than seven times the weight of the compact floor safe on this page — genuine fire resistance takes mass, and a slim between-the-studs or between-the-joists safe simply does not have room for it.
If fire protection is actually the priority — not just a nice-to-have alongside concealment — a dedicated standalone fireproof safe will beat every option on this page, wall or floor, because it is not fighting a depth constraint. Our guide to choosing a home safe by threat type covers UL-rated standalone models specifically. Think of a wall or floor safe here as solving “a burglar can’t find it,” and a standalone fireproof safe as solving “a house fire doesn’t destroy it” — they are not substitutes for each other.
Wall Safe vs Floor Safe, Side by Side
| Wall Safe | Floor Safe |
|---|
| Typical cavity used | Space between two studs, 16″ on center | Concrete slab (cored) or a wood joist bay |
| Typical install effort | Weekend DIY for most homeowners | DIY on a wood subfloor; often professional on a slab |
| Access position | Chest or eye height, no kneeling | Floor level, requires kneeling |
| Usable depth | About 3.5″ (2×4 wall) to 5.5″ (2×6 wall) | Set by joist depth or how deep you core |
| Fire rating typical of compact models | Rare — none of this page’s wall picks are rated | Possible, but usually only in larger, heavier models |
| Best concealed by | A picture, mirror or shelf hung over it | A rug, cabinet or closet floor over it |
| Weakest against | Someone who knows exactly where to check on a wall | A slab that later cracks or settles near the safe |
Paragon Lock & Safe In-Wall Safe — the DIY-friendly default
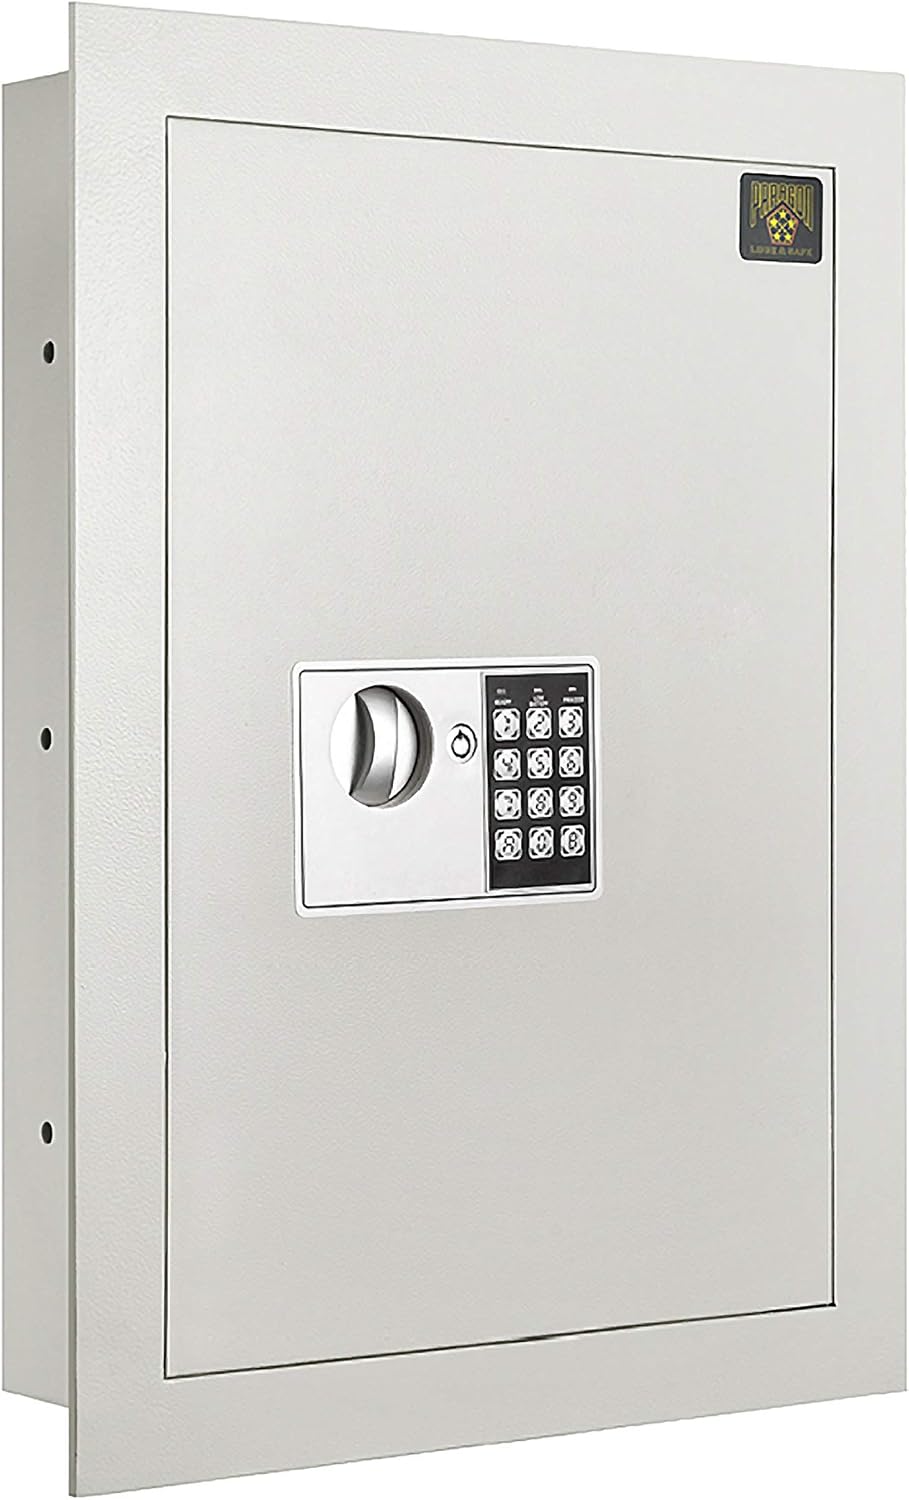
Key specs: 4″D x 16.25″W x 22″H exterior, fits between 16-inch on-center studs; 0.83 cubic feet capacity; digital keypad plus 2 manual override keys; audible alarm after repeated failed codes; alloy steel construction; not water resistant, no fire rating
This is the pick for most readers who land on “wall safe” after reading the sections above: standard 16-inch stud framing, a straightforward digital keypad, and a price that does not make a first-timer nervous about ruining a wall for nothing. Real buyers installing this exact model describe cutting the drywall opening, finding it “fits between the wall studs (US building code) without any issues,” and bolting it in with the included hardware in well under an afternoon. Several reviewers swap the included bolts for higher-quality lag screws, a cheap upgrade rather than a real defect.
✅ Pros
- Sized for standard 16-inch on-center stud spacing, the most common wall framing in US homes
- Genuinely realistic DIY install — a stud finder, drywall saw and drill cover it
- Digital keypad plus 2 physical backup keys, so a dead battery never locks you out
- 0.83 cubic feet is enough for documents, jewelry and a modest stack of cash
❌ Cons
- No fire rating and not water resistant — a security product only, not a document-fire safe
- The door and keypad sit slightly proud of the wall, so a flush picture-frame cover needs a shallow shadow box
- Real buyers report the middle shelf is mostly unusable because the locking mechanism eats the space behind it
- Some buyers found the audible keypad beep loud and disabled it themselves, which is not an officially supported modification
Viking Security Safe VS-52BLXW — biometric quick access
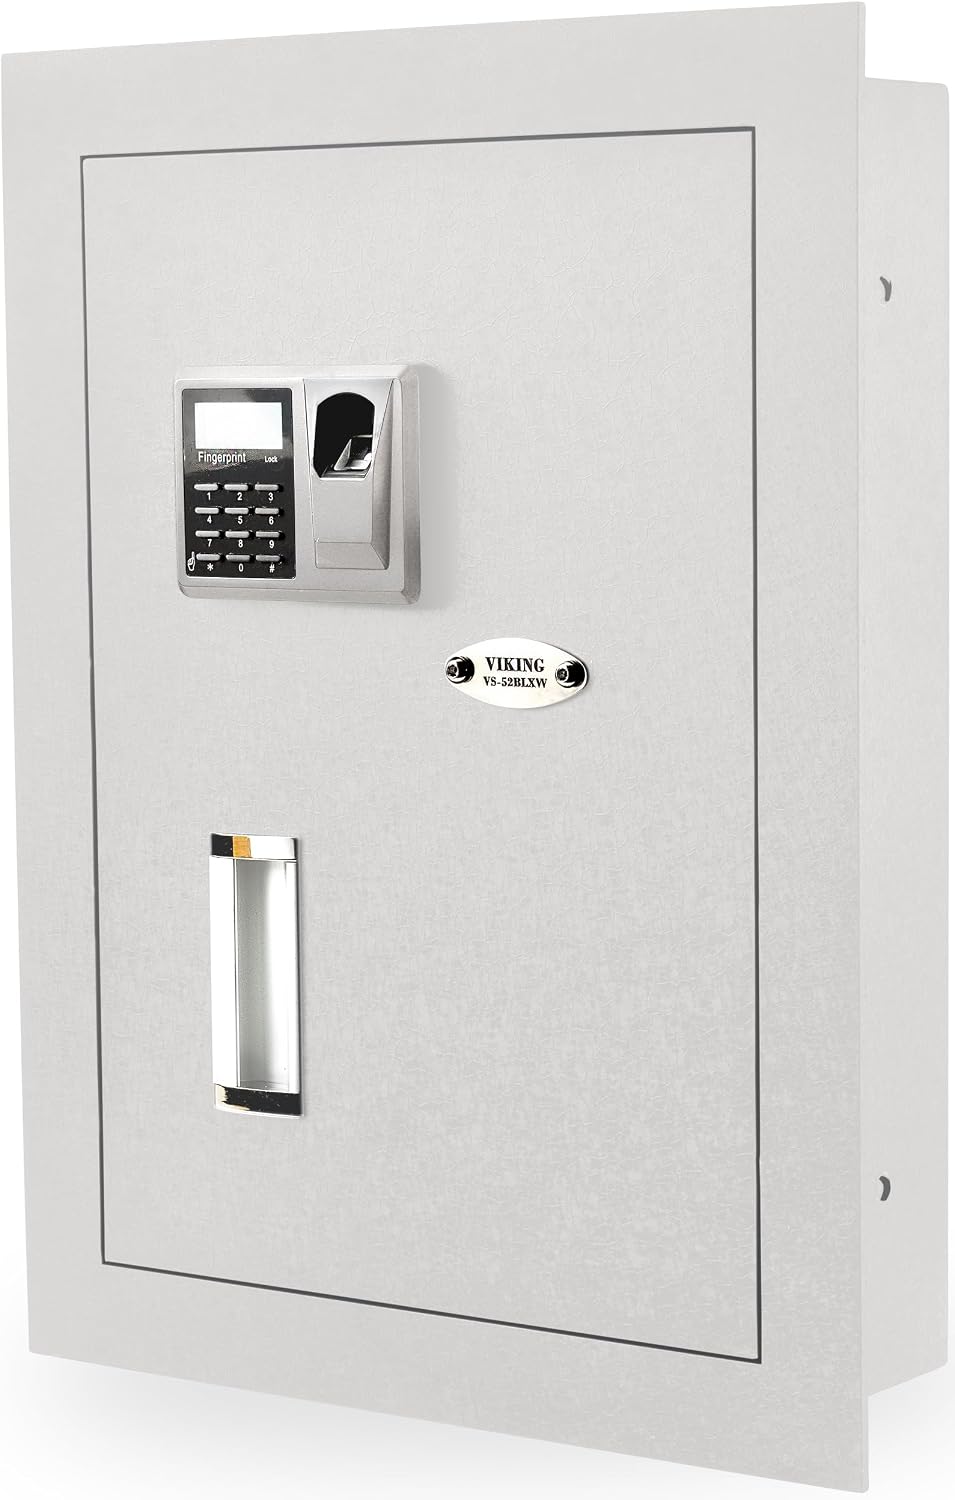
Key specs: 4″D x 14″W x 19.3″H exterior, fits between 16-inch on-center studs; fingerprint, PIN or key entry, stores up to 32 fingerprints; motorized 20mm steel deadbolts; 3 adjustable carpeted shelves; alloy steel; not water resistant, no fire rating
The step up from the pick above, for readers who want fingerprint access instead of typing a code. It stores up to 32 fingerprints, enough for an entire household, and still fits the same 16-inch stud bay. Be honest about the review count first: this listing carries a thin sample, so treat the strong average as an early signal rather than a settled track record the way the far more reviewed pick above already is. Buyers who installed it describe it as noticeably more solid, with a motorized deadbolt mechanism that feels purpose-built.
✅ Pros
- Fingerprint, PIN or physical key entry — three ways in, so one failure mode does not lock you out
- Motorized 20mm steel deadbolts and a pry-resistant anti-pry strip, heavier-duty than the budget pick
- Three fully adjustable, carpeted shelves rather than one fixed divider
- Fits the same standard stud bay as the cheaper pick, so the installation effort does not go up with the price
❌ Cons
- Thin review base for this specific listing — verify current buyer feedback before you order
- No fire rating and not water resistant, the same tradeoff as every compact wall safe here
- Costs roughly three times the DIY-default pick above for the biometric convenience
- The fingerprint reader and keypad project slightly further off the wall, making it harder to fully hide behind a flat picture
SentrySafe SFW205CWB — the most-reviewed floor safe
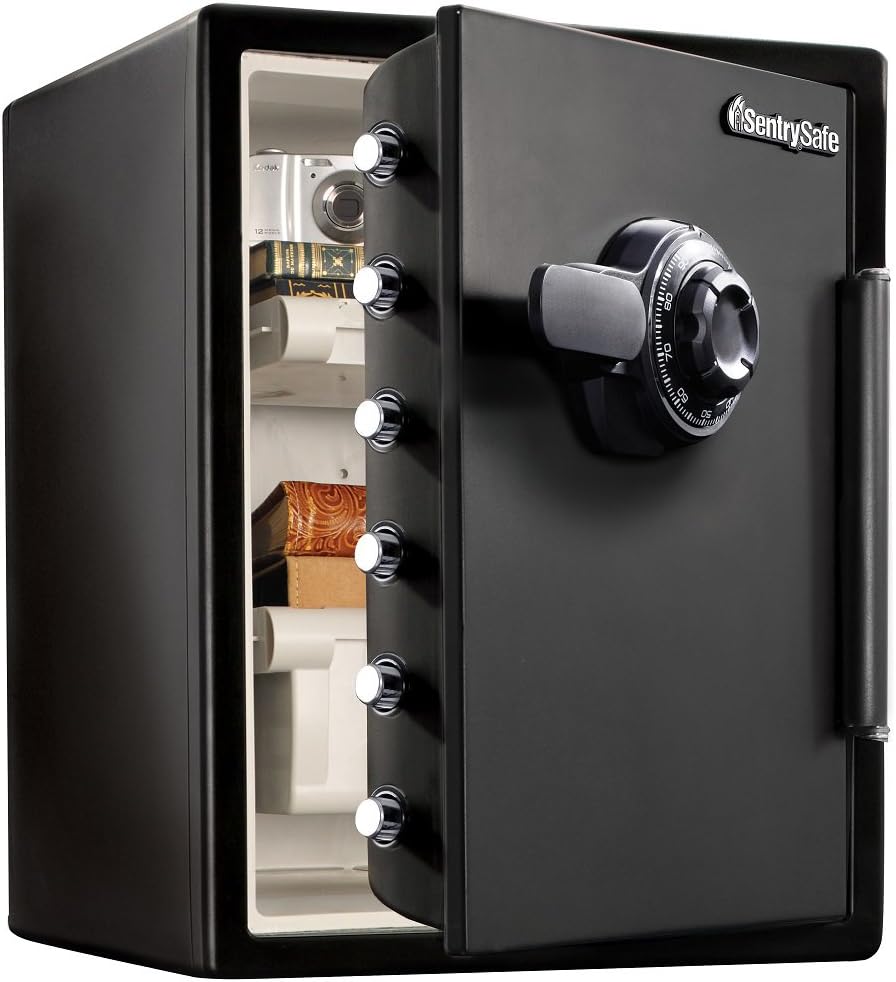
Key specs: 18.6″D x 19.3″W x 23.8″H, 124.8 lbs, 2.05 cubic feet; UL Classified fire rating of 1 hour at 1700 degrees Fahrenheit; ETL verified waterproof to 24 hours in up to 8 inches of water; mechanical dial combination with 6 steel locking bolts
This is the safe to buy if fire protection genuinely matters alongside concealment, and it is the most-reviewed product on this page by a wide margin, from a manufacturer that has made fire-resistant storage since 1930. Be clear-eyed about what “floor safe” means for this specific model: at nearly 24 inches tall and almost 125 lbs, it is not a slim unit that recesses flush and disappears under a rug the way the compact pick below does. Real buyers describe drilling through the floor and bolting it down rather than recessing it — a heavy, floor-anchored safe more than a hidden one, and moving it took two people or professional delivery help for more than one reviewer. If flush concealment is the priority, the next pick is the better fit; if fire and water protection are, this is it.
✅ Pros
- The only safe on this page with a genuine, independently tested fire rating: UL Classified for 1 hour at 1700°F
- Separately ETL verified waterproof for 24 hours in up to 8 inches of standing water
- By far the largest review base of any pick here, from an established fire-safe manufacturer
- Mechanical dial lock needs no batteries, so it cannot fail from a dead battery the way a keypad can
❌ Cons
- At almost 125 lbs, this is a two-person or professional-delivery installation, not a solo DIY job
- Its height means most real installs bolt it down rather than truly recess it flush — concealment is weaker than the name suggests
- Roughly triple the price of the compact floor safe below
- A verified buyer reported the manufacturer’s own manual warns against storing delicate items like jewelry or photos directly inside without an airtight container, due to moisture-absorbing fire insulation
Barska AX12656 Hidden Floor Safe — true flush concealment on a budget
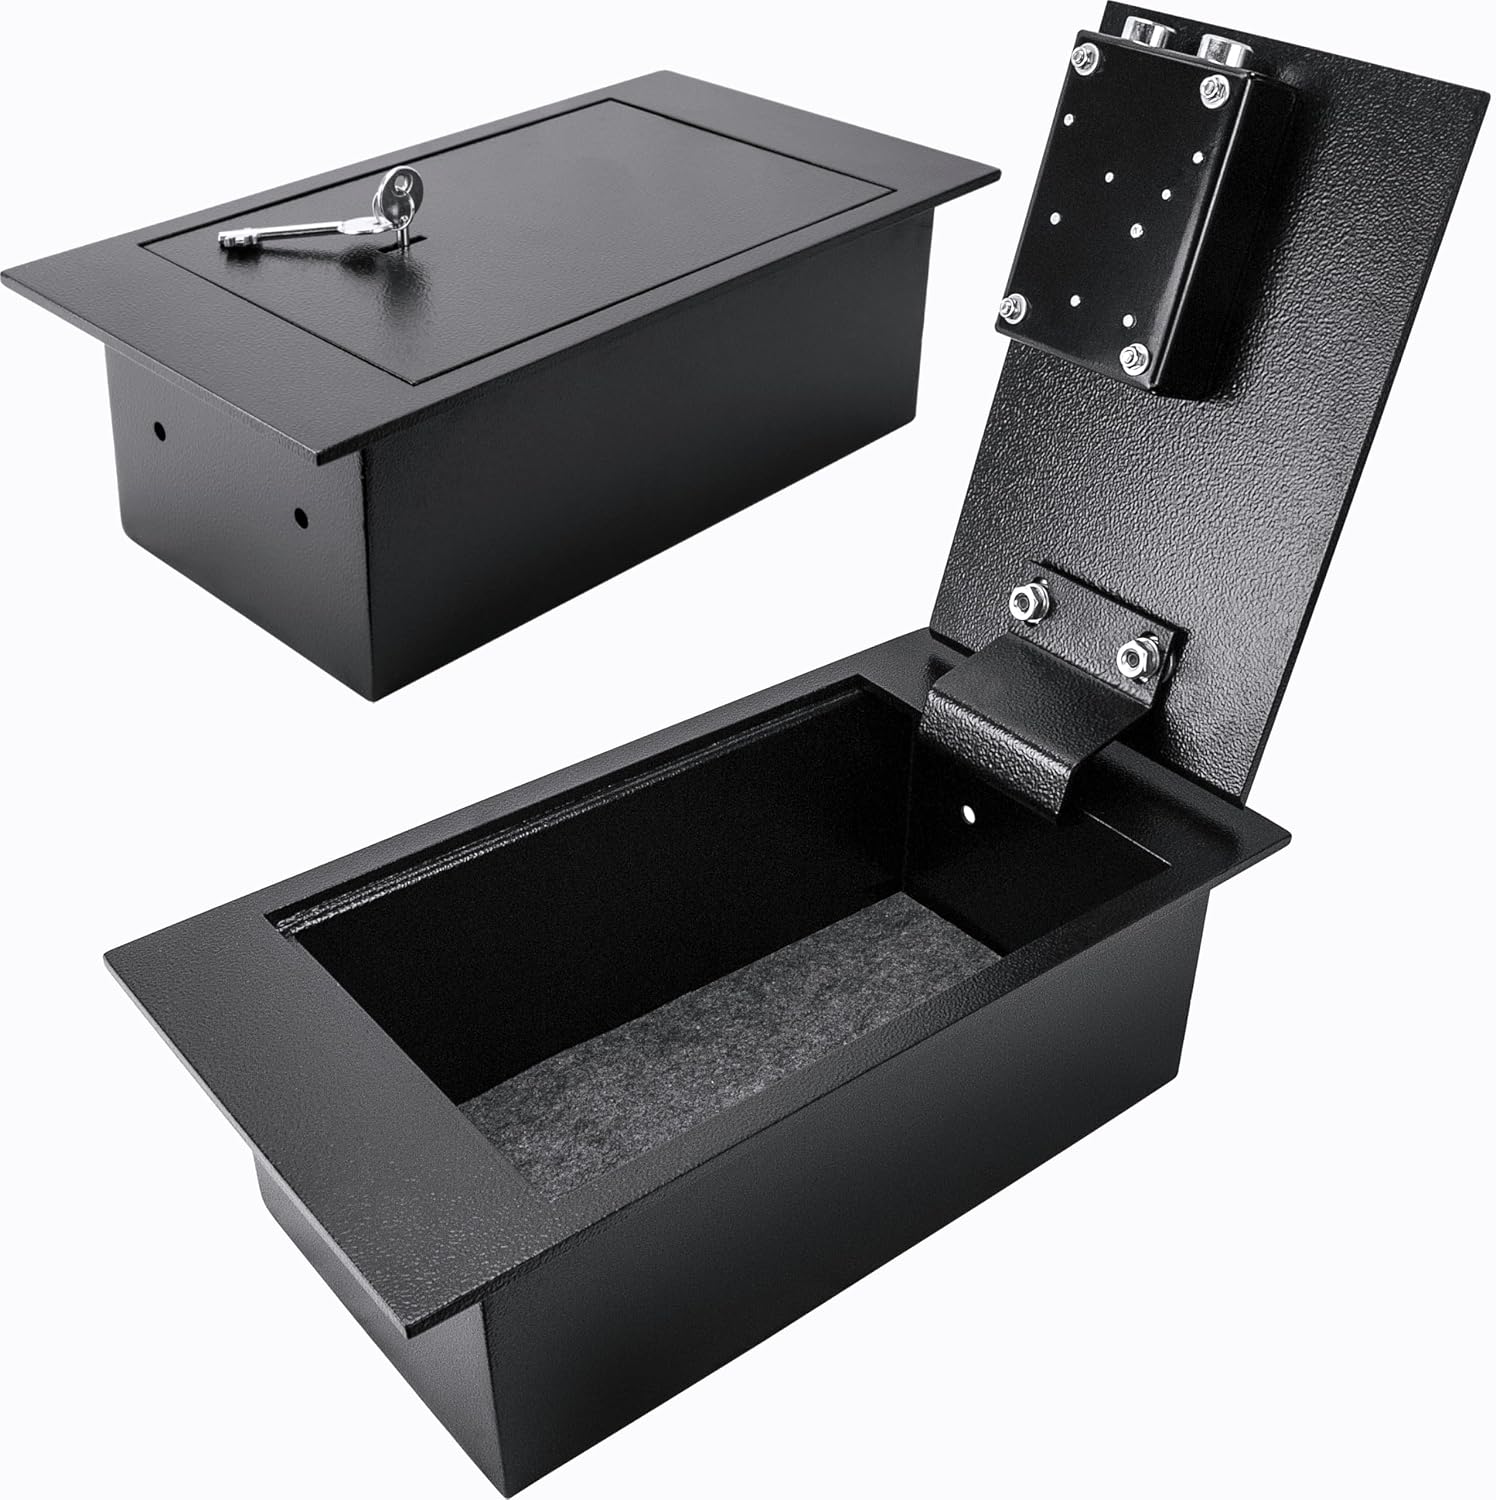
Key specs: 8″D x 15″W x 15″H exterior, mounts flush between floor joists under most floorboards; 0.22 cubic feet capacity; 2 steel locking bolts, key entry; water repellent only, not waterproof; no fire rating
If what you actually pictured while reading the “floor safe” column above was something small, flat and invisible under a rug, this is that product, and it is the cheapest pick on this page. It mounts between existing floor joists under floorboards “without the need for any additional framing or modifications,” sitting level with the surrounding floor once installed — a meaningfully easier job than the concrete work a true in-ground vault requires, and the honest entry point for readers without a slab to core.
✅ Pros
- Genuinely recesses flush with the floor, unlike the taller floor-mounted pick above
- No additional framing needed — designed to work with joists already there
- By far the cheapest safe on this page, with a limited lifetime manufacturer warranty
- Small enough to disappear completely under a rug, cabinet or closet floor
❌ Cons
- Tiny capacity at 0.22 cubic feet — cash, passports and small jewelry, not much more
- Water repellent only, not waterproof, and carries no fire rating at all
- A verified buyer measured the exterior slightly larger than the listed dimensions, so leave a little extra margin when cutting the opening
- Key-only entry with no backup code — losing both included keys means a locksmith, not a reset
DIY or Professional? The Honest Installation Reality Check
Both categories are technically DIY-able, but not the same way. Here is roughly what each install path actually involves.
What Each Install Actually Looks Like
1
Wall safe: locate
Stud finder plus a small inspection hole to confirm the bay is clear of wiring, vents and plumbing.
2
Wall safe: cut and mount
Drywall saw for the opening, then lag bolts into the studs on both sides. Most reviewers finish in an afternoon.
3
Floor safe (wood subfloor): locate
Confirm joist spacing and depth from below if you have basement or crawlspace access.
4
Floor safe (wood subfloor): mount
Cut the opening between joists, never into one, and bolt or set the safe flush.
5
Floor safe (slab): assess
Identify what runs through the slab — post-tension cables, radiant heat, plumbing — before any coring.
6
Floor safe (slab): install
Concrete coring is specialized work; this is the step most homeowners hand to a professional.
The two wall-safe steps and the wood-subfloor steps are realistic weekend DIY. The slab steps are where professional help becomes the honest default rather than an option.
If you are already budgeting for a professional installer, it is worth pricing that against what a monitored system would cost for the same rooms — our full cost breakdown of a home security system lays out labor and equipment costs the same way. And if concealment alone feels like overkill for what you are protecting, our guide to DIY home alarm systems covers the alternative: deterring the burglary in the first place.
Which One Actually Fits Your House
Strip away preference and this decision is mostly made by the house you already live in. A slab-foundation home without a basement makes a wall safe the practical default, because coring a slab for a floor safe is a real professional job rather than a weekend one. A home with a basement or crawlspace opens up the wood-subfloor floor safe as a genuine DIY option, on equal footing with a wall safe. And a rented apartment or condo takes both permanently off the table for most tenants — you generally cannot cut into a shared wall or floor structure without landlord permission, full stop.
Match the Safe to the House, Not the Other Way Around
🏠 Choose a wall safe if…
- Your home sits on a slab foundation with no basement access
- You want an install you can finish yourself in one afternoon
- You would rather reach a safe at chest height than kneel to it
- You are in a multi-story home and want the safe on the floor you actually use most
🕳️ Choose a floor safe if…
- You have a basement or crawlspace, making a wood-subfloor install realistic DIY
- You are budgeting for a professional installer on a slab specifically for fire-and-flood-style concealment
- You have a permanent rug, cabinet or closet floor to cover it completely
- Nothing you are storing needs to be reached quickly or often
If you are renting, neither of these is realistic without your landlord’s sign-off, and most leases will not give it. Our no-drill security guide for renters covers portable alternatives that do not touch the structure at all, and if you are specifically weighing a full alarm system against standalone cameras for an apartment, our apartment security decision guide walks through that separate question.
Final Recommendation
Start with your foundation, not the product page. If your home is built on a slab with no basement, buy the Paragon Lock & Safe In-Wall Safe — it is the realistic DIY answer for that house, full stop, and the far larger review base makes it the safer bet than the biometric alternative for a first-time buyer. If your home has a basement or crawlspace and you specifically want fingerprint access, step up to the Viking Security Safe VS-52BLXW instead.
If concealment below the floor is what you actually pictured, and your home gives you joist access rather than a slab, the Barska AX12656 Hidden Floor Safe is the honest entry point — small, cheap, and genuinely flush with the floor. Reach for the SentrySafe SFW205CWB only if fire and water protection matter as much as concealment does, and budget for the fact that it behaves more like a heavy anchored safe than a vanishing one.
And if none of these four actually solve what worries you most — specifically a house fire rather than a burglar who searches your bedroom — skip concealment entirely and go read our guide to standalone fireproof safes instead. A wall or floor safe and a fireproof document safe are answers to two different threats, and buying one when you needed the other is the single most common mistake in this category.
SafeBode does not yet run an in-house product testing program. This guide is built from manufacturer specifications, official support documentation, current retail listings and verified buyer feedback rather than hands-on testing, and we say so plainly rather than implying testing we have not done.
Frequently Asked Questions
Is a wall safe or a floor safe more secure?
Neither wins on raw strength. Both are concealment products first, meaning their real security comes from a burglar not knowing where to look rather than from steel thick enough to resist a determined attack. Pick based on which cavity your house actually gives you easy access to, not on which sounds tougher.
Can I install a floor safe myself?
It depends entirely on what is under your floor. A compact model designed for a wood subfloor mounts between existing joists and is a realistic DIY project. A true in-ground safe set into a concrete slab usually means coring concrete without hitting plumbing, post-tension cables or radiant heat lines, which is a job most homeowners hand to a professional rather than attempt themselves.
Do wall safes and floor safes protect against fire?
Most compact models do not. Look specifically for an independent UL 72 fire classification rather than an unverified “fireproof” label on the listing. Genuine fire resistance adds mass, which is why it shows up far more often in larger, heavier safes than in slim between-the-studs or between-the-joists models.
What size stud bay do I need for a wall safe?
Most in-wall safes are built for the standard 16-inch on-center stud spacing used in typical US residential framing, and are sized to drop into that cavity without cutting a stud. Confirm your actual stud spacing with a stud finder before ordering, since older or hand-framed homes do not always match that spec exactly.
How deep can a wall safe be?
Wall depth sets the ceiling. Standard 2×4 wall framing gives roughly 3.5 inches of usable depth behind the drywall; 2×6 framing gives about 5.5 inches. A wall safe cannot be any deeper than the wall it sits in, which is the main capacity limit of the entire category.
Should I bolt a floor safe to concrete or just set it in place?
If a model includes concrete anchor bolts, use them. An unanchored safe, however heavy, can potentially be pried out and carried off wholesale by someone with enough time and leverage, which defeats the point of a fixed installation.
Can I put a fireproof document safe inside a wall or floor safe cavity instead?
Not usually. Most wall and floor safe cavities are sized tightly around one specific product’s dimensions, and a genuine UL-rated fireproof safe needs far more depth for its fire-resistant lining than a stud or joist bay provides. Treat concealment and fire protection as two separate purchases rather than trying to combine them in one cavity.
What is the biggest mistake people make choosing between these two?
Buying based on which sounds more secure rather than what their house’s construction actually supports. A floor safe bought for a slab-foundation condo, or a wall safe bought for a stud bay that turns out to be full of plumbing, both end up as an unopened box rather than an installed safe.
Sources
Show sources (8)
- [1] Liberty Safe — “Floor vs. Wall Safes: Which Is Right for Your Valuables and Space?,” libertysafe.com/blogs/the-vault/floor-vs-wall-safes-which-is-right-for-your-valuables-and-space
- [2] SafeWise — “Best Home Safes,” safewise.com/home-safety/best-home-safes/
- [3] UL Standards & Engagement — “UL 72, Standard for Tests for Fire Resistance of Record Protection Equipment,” shopulstandards.com/ProductDetail.aspx?UniqueKey=29344
- [4] SentrySafe SFW205CWB product listing, amazon.com/dp/B00HS3NI4W
- [5] Barska AX12656 Hidden Floor Safe product listing, amazon.com/dp/B01C4WVHQM
- [6] Paragon Lock & Safe In-Wall Safe product listing, amazon.com/dp/B0040HOKGE
- [7] SafeHome.org — “Home Security Statistics,” safehome.org/data/home-security-statistics/
- [8] Viking Security Safe VS-52BLXW product listing, amazon.com/dp/B0CSZXS5NQ


